Tuesday, December 18, 2012

simple canvas

I have tons of scrap fabric and Ive seen other things on pinterest like this one by making a canvas of your own. I used the top of a shoe box and covered it with a felt-like fabric.

 
Then added a few pictures..
 
And hung it up in my sons room :)


Saturday, December 15, 2012

sweater sleeves to leg warmers

 
I was looking in the "church clothes" section of my closet (which I never use by the way)
and I came across this brown crocheted sweater which I will NEVER wear. Just not my style.
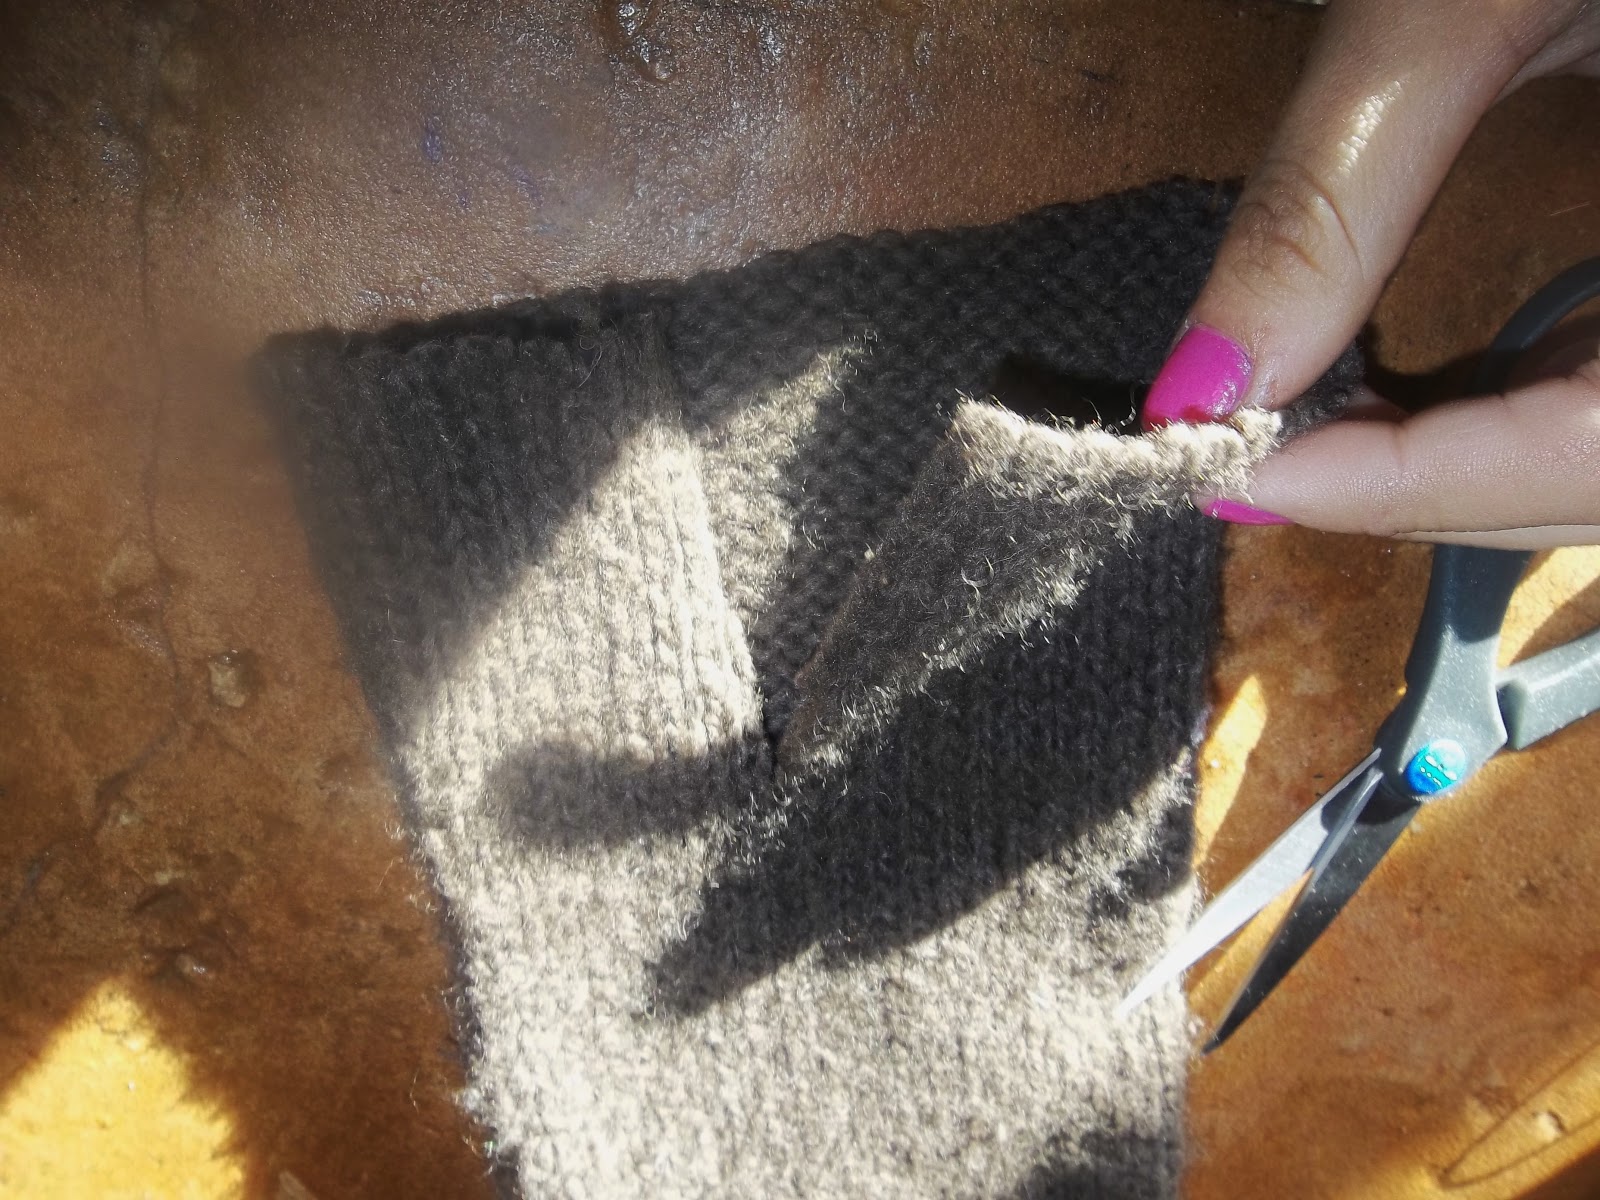
so I thought LEG WARMERS. I cut off the sleves and used fabric sissors to do so, much more even cut and wil prevent "fabric rolling."
So After cutting the sleeves off I also cut off the buttons down the front. There were 4.
I measured the warmers accordingly then slit a line down where it would lie on the side of your leg. Dont know if that makes sence but you know what I mean .....
I then hand sewed two buttons vertical  to one another on the left side of the slit. Do so for each one, then cut two tiny slits on the opposite side for the button to slide through.


           not bad not bad. and theyll keep my legs warm in this freezing weather. Ill deff. be making another, better, pair of these soon!


Saturday, November 24, 2012

Chicken and biscuit bake


This is the second time ive made this and it is so so good. and so easy to shred for my toddler to eat! :)

Recipe:
-Biscuits (I used sara lee bagged ones but you could use home made)
-Cream of chicken soup
-Chicken
-A crockpot

Its so simple I just seasoned my chicken in the crockpot cooked it on high for two hours then took it out and layed it into a pan. Then, pour the cream of chicken soup on top of each piece of chicken and place biscuits inbetween. Put into the oven at 350 degrees for about 15 minutes. Enjoy.

Sunday, November 4, 2012

DIY christmas project

So I've been thinking of a very simple chrismas craft for me and my one and a half year old to do. Something not too messy, not too complicated, or not something that would take a long time due to him barely being able to sit in one place for longer than 3 minutes. HA.
I went into michaels and was looking at christmas stuff and seen these blank ornaments marked at 1.69 a piece but were on sale for 50% off. um, score. I only bought one because I wanted to make sure this wouldnt be a big fail. I poured some red paint onto a plate and used a sponge brush and painted it onto my sons hand. While holding the other one down and trying to keep it from his mouth.. I then handed him the ornament and he grabbed it like he would grabbed a ball so the handprint went on perfectly! Add some glitter with glue and write whatever you desire on the back. Theres so many ideas that can be done with this simple glass ornament. Cant wait for christmas!


Saturday, October 13, 2012

turning the back of a shirt to lace

So my mother in law let me borrow her sewing machine and I need to share this expierence, and if you are a sewer youll completely understand. So she brought me her sewing machine and threaded it for me and everything, didnt show me how to threat both needles just did it for me. Showed me some stitches on a practice piece of scrap. You know basic sewing stuff. So then she left and im attempting to sew on my own...bobbin keeps falling out all the strings kept getting tangeled ive been working with this sewing machine for 3 days now and have STILL not accomplished any sewing project. I even replaced the needle. So anyway, I ended up HAND sewing this because I already bought the material and I wasnt gunna let it get wasted by this worthless sewing machine that was NOT being compliant with me. Heres a short tutorial on how I did this one
First I cut the back of the shirt off like this.
 so only the front of the shirt is left to work with. I then laid the lace material (got at walmart for 4.99 a yard but I only used a half a yard or less) behind the backing of the shirt that I cut off and SAVED..
that is the back part of the shirt ^
Then I cut the lace around kinda like tracing it.
I sewed the "back lace" onto the front and sewed it like it would be inside out and then trimmed all the string up at the end flipped it right side out and wa laaaaa..


Monday, October 8, 2012

Monday morning craft: Toddler motor skills toy DIY


I always see all these moms posting on pinterest "twenty things to do with your toddler" or "ways to distract a toddler." I discovered this womans blog who specialized in these type of things and I ended up reading A LOT of her stuff. I seen this project on her website and decided to give it a try, as my son loves to practice his motor and development skills ;).

What youll need
  1. Wrapping paper of your choice
  2. An empty container you could use a pringles one etc. (I used a container that dry bread crumbs came in) you get the idea...
  3. Large bottle caps. Gatoraid bottles, vitamin waters, etc.
  4. Stickers for decoration
  5. Tape
  6. Knife or sissors
Okay so first I washed the bottle caps and container really well with soap and let dry.(figuring that my 15 month old will taste every piece) Next, I cut wrapping paper to the size of the container and taped one side underneath and overlapped the other side and taped together so you get this,

 
Now take the plastic lid that the container comes with and cut a hole in the top that each bottle cap can fit through. Decorate the bottle caps with stickers put the cap on the container and let your little one get to work!


Sunday, October 7, 2012

glitter jar!

It's sunday and I was typically looking for something to "glitter-fy" today. I went searching down in the basement to find this little plain clear glass jar. Heres what you'll need: loose glitter, a jar, elmers glue, water, and a thick painting tool(like a styrafoam brush).
 
Mix together on a plate 50/50 mix of water and elmers glue. Use the styrafoam brush to mix it up then brush it onto the jar and sprinkle glitter immediately. Do one side at a time. Once finished let dry for 10 minutes and go over the whole jar with more of the water/elmers glue mix to seal.